FROM INTONATION TO INSTRUMENT DATING
Scroll down this page for informative articles & tips on these topics:
Tubes & Tube Amps
Ohms, Speaker Wire & Bi-Amping
Date Your Guitar
Truss Rod Adjustment
Setting Up Your Guitar
Compressors & Limiters
Avoiding Hum
Amps & Speakers
Drumset Assembly
Drumset Tuning
The Lowdown on Effects
Slide Guitar
Check Back often for new tips & topics.
|
|
Tubes & Tube Amps
Guitarists both yesterday and today can be linked by one piece of equipment: The tube amp. With all the strides in transistor amp technology, guitarists still prefer tube amps. Why do tube amp designs sound and feel differently from solid-state? Simply, tubes work differently.
What is a tube? A tube is an electronic device consisting of a minimum of four active elements: a heater (filament), a cathode, a grid and a plate. All sealed in a vacuum glass enclosure to prevent parts from burning. Once heated, the cathode begins to emit electrons, which flow from the cathode (which is negatively charged) toward the plate (which is positively charged). The grid's purpose is to control this flow, in effect, acting as a valve.
How do Tubes Work? When the guitar's pickup produces a small voltage (the result of the string vibrating in the pickup's magnetic field), this signal is applied to the grid, which causes a large current flow from the cathode to the plate. Because of this, a correspondingly large voltage now appears at the plate. A portion of the amp's electronic circuitry, the grid bias control, adjusts the proper voltage setting of the grid. When the grid bias is properly set, the tube is balanced to the circuit, and therefore produces a clean, powerful signal. The plate is connected to an output transformer, which matches the impedance to that of the speaker.
How do Tubes Distort? As the signal emitting from the plate approaches its maximum potential, the tube gradually begins to react less and less to the original input signal. This results in a type of compression of the signal, and the signal becomes cut off or "clipped." Tube distortion ("clipping") occurs gradually, producing low order distortion which compliments the original signal, creating a warm sound. This is also why it's easy to move between clean and distorted tones.
Why do Tube Amps all Sound Different?
Types and quality of tubes vary, some tubes amplify more than others.
The amount of gain a tube produces varies with the each amp's circuit design, some tubes amplify more than others under similar conditions.
The 4 amp stages:
Preamp Stage - Amplifies an incoming guitar or mic signal for tone shaping.
Signal Processing Stage -This is where you add the effects, reverb, tone controls, etc.
Power Amp Stage -The real workers in your amp. Most amps over 10 watts use an alternating push/pull power amp design- when one tube is on, the other is off. Your amp may have two, four, six or possibly eight power tubes.
Rectifier Stage -Converts AC wall electricity to the DC electricity inside your amp. Most modern amps have sold state rectifiers.
Why Should You Replace Your Tubes?
Glass, metal, lots of little parts... tubes are subject to mechanical problems and are not meant to last a lifetime. Actually, the harder you work your tubes, the faster they wear out. Which means that from time to time you will need to replace your tubes. More reasons to replace your tubes:
When one starts to go, it drags the others down with it, decreasing the over all efficiency of the amp.
The better the tube, the better the tone. Simply put, the best reason to replace your tubes with Groove Tubes is that they'll make your amp sound better.
Bottom Line:
Pay attention to your amp's performance. When you hear the sound begin to deteriorate, it's time to change your tubes. Your amp will last longer. Your tone will always be at its best. Think about it, you don't wait until the strings break before you change them, do you? Look for these signs that Your Tubes May be Deteriorating:
Loss of highs or lows
Muddy chords
Poor balance in the output levels of various notes
Lacks punch
Makes funny noises
Amp starts sounding weak
Power fading up and down
No sustain, or fast decay
|
Ohms, Speaker Wire & Bi-Amping
8 ohm load, 4 ohm load = the resistance (impedance) the amplifier feels this resistance. When the load decreases, ( say 4 ohms instead of 8 ) the amplifier's output increases because there is less resistance to the power coming from the amp. The speakers can draw more power from the amp. DANGER! Drawing more power than the amplifier was designed for will damage the amp.
Every amplifier is designed to handle a certain load. All amplifiers can handle a higher resistance (load), but they will produce less output. Most quality amplifiers can also handle a lower resistance. A good rule of thumb is not to go below 2 ohms or above 16 ohms. DANGER! With stereo power amps, always avoid running 1 speaker cabinet one side and two or three on the other. This goes for any unbalanced number of speakers on one side. The ohms are bound to be messed up and you could damage that channel or the whole amp.
How to bridge an amp?
First, make sure that the amplifier you have is bridgeable. If you try to bridge an amp that is not designed to be bridged, you can damage the amp. Basically, when you bridge an amp you use the + terminal from one channel and the - terminal from the other. The instructions that came with the amp should describe which terminals to use. If not, look for some indication next to the speaker terminals on the amp. Sometimes, there will be lines connecting the two terminals you should use to bridge the amp.
What happens when you bridge an amp?
Theoretically, the output should be 4 times the power of a single channel on the amp. A 50Wx2 amp bridged would act as a 200Wx1 amp. Unfortunately, you only see about 2/3 to 3/4 of this power. This number is usually the same as the combined power of the 2 channels at half the load. Take the following example of a 2 channel stereo amplifier:
50x2 stereo at 4 ohms
75x2 stereo at 2 ohms
150x1 bridged at 4 ohms
Unless stated otherwise, this amp would be unstable below 2 ohms stereo or 4 ohms mono bridged. Attempting to use an amplifier at an unstable load will damage the amp.
How do you run speakers in parallel?
Wiring speakers in parallel is simple. Connect the + terminal on the amp to the + terminal on each speaker. Then do the same for the - terminals. For two 4 ohm speakers, the total impedance would be 2 ohms.
How do you run speakers in series?
It is not suggested that you run speakers in series. No two speakers will be exactly identical, even if they are the same model from the same manufacturer. This means that they will act slightly different from each other when presented with the same input signal. When wired in series, these differences will cause distortion in the form of back EMF.
What is bi-amping?
Bi-Amping refers to using different amplifiers (or different channels of the same amp) for the low and high frequencies in the same speaker. Usually, the mid and tweeter are driven by one amp, and the woofer is driven by more powerful amp. This allows you to purchase a high quality low power amp for the highs, and a more powerful amp for the lows. With the proper pre-amp you can also have more control over the bass output.
In DIY audio, bi-amping has even more advantages. Low pass crossovers
for woofers require very large inductors. These inductors are basically very long coils of copper wire which can have a very high resistance. Using an active crossover before the amplifier removes the need for these inductors. Bi-amping also removes the need for any circuits to fix problems caused by different sensitivities or impedances between drivers.
If a speaker is capable of bi-amping, then the plate on the back of the speaker will have 4 binding posts: 2 + terminals and 2 - terminals. Both + terminals and both - will have a piece of metal connecting them together. To bi-amp the speaker, remove the metal piece. Then, use the top 2 terminals for the high frequency amp, and the bottom two terminals for the bass amp.
Note: some professional audio equipment has 4 binding posts on the back. This is for ease of running multiple speakers in parallel. It is not for bi-amping, and the terminals should not be connected.
What size speaker wire should I use?
FYI: Wire sizes get fatter as the gauge number gets lower, i.e. 12 gauge is bigger around than 18 gauge.
Different wires will have different line capacitances, which can cause the wire to act as a low pass filter.
Here is a good rule of thumb...
Under 250 watt amp running 20 feet of wire or less...18 gauge should be fine.
Over 250 watt amp running 25 to 75 feet... 16 or 14 gauge should be used.
Higher powered amps running long distances to speakers should use 14 gauge or lower.
You may be temped to use typical electrical wire instead of speaker wire to save money. The copper in electrical wire is of less quality than speaker wire, and will be prone to rust. Also, the insulation isn't of the same quality as speaker wire.
|
|
|
|
Date Your Guitar
Want to know how old that guitar REALLY is? Click on guitar to the left & you willgo to a site from your friends at Almost Music & date your guitar. |
Truss Rod Adjustment.
When do you need a trussrod adjustment?
If you change your string gauge drastically (heavier or lighter) you may need a neck adjustment. Likewise, an older guitar or one that has been subjected to temperature or humidity changes may need adjustment. A typical symptom is it will be harder to play or it buzzes on some frets.
Note:
Trussrod adjustment is the act of moving the fingerboard toward the strings or away from the strings. This movement is most noticeable between the 3rd and the 12th fret.
O.K., so your instrument is strung with your choice of fresh strings and is tuned to correct pitch. You are now ready to check the neck for RELIEF. Relief is the small amount of bow that we actually want in a properly adjusted neck. (A fingerboard must have relief because the strings travel in a long shallow curve, and would strike the frets if the neck were perfectly straight.)
With time, a trained eye can peer down the neck and see the relief or lack their of as well as detect a twist. But this can take years to learn (some people never do) so to get started we will use the first string as a straightedge to check the amount of relief. Begin under a good bright light. Sunshine or an unshaded light bulb work well. Indirect lighting or fluorescent tubes do not.
Fret the first string behind the first fret with your left index finger, and then fret it also between the fourteenth and fifteenth frets using your other (right) index finger. While still pinning the string tightly, eyeball the string and the frets beneath it at the point halfway between your two fingers. A guitar or banjo should have .007" to .010" relief between the string and those frets. A mandolin is about half of that.
NOTE: A neck can develop a bow where the treble side of the neck my show the correct mount of relief but the bass side of the neck may not have any relif. This can be a sign of a problem but we will cover this later!
If the string lies on the frets or has only a sliver of clearance, your neck is too straight and needs to be relaxed (more bow by loosening the trussrod). If there's more than the thickness of the first string, the neck is a bit too bowed, and the trussrod needs to be tightened.
If you have determined that your neck is in need of adjustment, then it's time to reset the trussrod tension.
NOTE: some instruments do not have an adjustable trussrod. (Many inexpensive instruments have NO trussrod, or at best have one that cannot be adjusted. Oddly, this is also true of older Martin guitars and some Gibson mandolins.) Such instruments require professional help.
Providing you do have a trussrod nut, it will be found either on the headstock, usually under a cover plate; or beneath the fingerboard inside the sound hole. Some nuts accept Allen wrenches, some take hex sockets, and a few use Phillips screwdrivers. If you don't know what these are, or don't own any, you probably shouldn't try to adjust your own trussrod............
Therefore, heed these words of warning: All trussrod nuts tighten clockwise and loosen counterclockwise. Tightening the rod will straighten the neck and loosening it will allow more bow (relief). But the total play between the time the nut takes up tension and the time the trussrod breaks is often no more that one half turn! So if you begin to adjust the nut and it fails to move when moderate pressure is applied, STOP! Similarly, if the nut does turn but the neck fails to respond, STOP! Do not chance breaking your trussrod. If you do so, you will be in for several hundred dollars in repairs, and you may have to junk the instrument entirely.
Always take the instrument to a professional repairman or Luther when the least doubt as to either the trussrod's condition or your ability to correct any problems. You only get one chance to do this right, which is why you no longer get a free trussrod wrench with your new instrument. Too many folks busted their trussrods and then asked the maker to repair the damage on warranty.
Assuming that everything works as advertised, adjust the nut in very small increments, checking for relief changes after every single tweak.
NOTE: wood takes time to settle after an adjustment, so you may need to readjust after a few days.
This is because no two necks react quite the same way; some will move quite a bit with a very small amount of input, and some will not.
|
|
|
|
Setting Up Your Guitar
By Dennis Kambury
You finally bought that guitar you've been eyeing for a long time. You open the case, gently remove it from its plush cradle, and hold it in your arms. A fresh pick in your fingers, you begin an elegant and complex arpeggio that ranges across the fretboard. Suddenly, right in the middle of the run, the strings start buzzing. You check your technique, and it's fine. So what's the problem?
Rest assured that it's not the quality of your guitar. The problem lies in the process of mass production. Without it, most guitars would not be affordable. To respond to demand and maximize profit, the factories build them and ship them as fast as possible. Very often, the human touch is involved, but setting up a guitar correctly is a painstaking, personal process that is best handled on an individual basis.
Although a complete tutorial is beyond the scope of a tech tip, we'll outline the basics, and give you some recommendations to further your pursuit of the perfect guitar! Caution dictates that if you don't know how to do the things we mention, you take it to a qualified luthier who has the experience and tools to accomplish these tasks quickly and easily. It's relatively inexpensive, and well worth it!
Another caution - for any alterations you perform, make them small! Adjust truss rods by no more than a quarter turn; shave saddles or nuts carefully; and always exercise caution.
First Things First
To get results that work for you, you need to assess your style, technique, and preferences, and make sure your guitar is basically prepared for those considerations. For example, if you like low, quick action, you will most likely go for a lighter gauge string set. Conversely, if you are after a meaty, chunky sound, you're a candidate for heavier gauge strings. Before you start, set your guitar up with the string type and gauge you prefer, and make sure it's in tune.
To get your guitar in top playing condition, you need to look at four specific areas: neck bow, or relief, string height at the nut, string height at the saddle, and intonation.
Relief
Take a look at your low E-string when you strike it, and note the curvature - how it "bows" in the middle. If you play hard, or use lighter, low-tension strings, this bow is more pronounced, and if you play quietly, or use higher-tension strings, you'll see a softer curve. If the strings are too close to the fingerboard, the vibrating string will hit the frets and result in buzz. You can solve the problem by raising the action high enough to prevent buzzing, but this can make the guitar difficult to play and increases the likelihood of intonation problems. Another way to avoid the buzz is to introduce a slight curvature to the neck that gives the middle of the string room to vibrate.
To check the relief of your neck, press the string at the first fret, and where the neck joins the body. If you find your strings are actually touching the middle of the fingerboard, you're guitar definitely need some adjustment! However, if the distance midway between the two points is around 1/64th of an inch, you're in the ballpark. If you are a light player, you can get away with less. And of course, if you are a hard player, you'll want a little more room for your fiery passages. To adjust the neck, follow the manufacturer's recommendations and adjust the truss rod to compensate. Usually, this means loosening a bit to increase the relief and bow in the neck, or tightening it to decrease the relief and straighten the neck.
String Height
The next thing you want to do is check the height of the un-fretted strings above the frets. At the first fret and at the 12th fret of the first and sixth strings, measure the distance from the top of the fret and the bottom of the string. As with relief, there is some room here for personal preference, but here are some general guidelines:
1st fret - 1/64th of an inch at the first string, and 1/32nd of an inch on the sixth string. This is good for both electric and acoustic guitars.
12th fret - 5/64th of an inch at the first string, and 7/64th of an inch on the sixth string. These dimensions are good for acoustic guitars. For electric guitars, the first string is 3/64th of an inch, and the sixth string is 5/64th of an inch.
If your string height is much higher or lower, you'll need to make some adjustments. The easiest place to start is the saddle. Most electric guitars have either thumbwheels or set-screws that make it easy to raise or lower the strings. To determine how much to raise or lower, a good rule of thumb is it will take twice the correction at the saddle as the amount that needs to be corrected at the 12th fret. For example, if you want the sixth string to be 5/64th of an inch, and it's 7/64th, you'll need to lower the string by 1/16th inch at the saddle.
Acoustic guitar is a bit more involved, as the saddle will have to be removed and carefully shaved to lower the strings, or shimmed to raise them. When shaving a saddle, use a flat file and make absolutely sure the bottom stays flat to prevent the saddle from rocking in its cradle!
You can also trim the nut, but that takes specialized tools, and unless you're already proficient in this area, we recommend the services of a pro.
Intonation
To check the intonation, play each string at the 12th fret, and compare it to the natural octave harmonic at the same location. If the fretted note is higher than the harmonic, adjust the saddle toward the tailpiece of the guitar to lengthen the string. Conversely, if the fretted note is lower than the harmonic, move the saddle toward the neck. Some bridges allow you to adjust each string independently, which makes it easy to get perfect intonation. Otherwise, you'll have to settle on a compromise that works for your particular style.
Acoustic guitars are more demanding, requiring the saddle itself to be cut to adjust each string's break point, and should be done by a pro.
Conclusion
Setting up your guitar properly will make it sound better, make it easier to play, and could possibly improve your playing! If you take your time, and work deliberately, you should have no trouble making basic adjustments and keeping your guitar in top playing condition.
|
Compressors & Limiters
A compressor reduces a signal's dynamic range. It does this by reducing the gain when the signal level is high, making louder passages softer and the dynamic range smaller. It is used in audio recording, production work, noise reduction, and live performance applications.
When signal levels get too high when recording, there will be distortion. Compressors and limiters provide protection against sudden transient sounds that could distort your sound or damage your equipment. It is also used for cutting tracks and adjusting the mix. It can smooth volume changes, adjust the dynamic range and balance of a track.
Compression can also increase an instrument's sustain. It amplifies the incoming signal to maintain a constant level, so after twanging a string, a little compression will preserve the string's sound. While adding sustain to your arsenal, compression also reduces your dynamics, making it difficult to accent notes and phrases. Be cool about compressing for the sake of sustain.
If you need to have a signal's level controlled by a different signal, it is called 'ducking' (it 'ducks' a signal out of the way) or cross limiting. Here's an example: While music is playing, using the microphone will cause the level of the music to drop so that it's easier to hear the singer. When mixing in the studio, a ducker can also be used to make certain instruments pop out of the mix.
A 'de-esser' is a limiter that monitors only a specific frequency range. It only reduces the level of frequencies in a selected range. This allows you to reduce unwanted sounds.
When using a compressor with other effects, many players put it first in the chain. First, it gives you a good signal to work with. And when the compressor is on and the output level is increased, the noise will be amplified along with the instrument's sound. Other effects can introduce more noise, so if the compressor is placed after those effects, it will end up amplifying their noises, too.
|
|
|
|
Avoiding Hum
By Dennis Kambury
You've hauled the equipment in, set it up, ran the snakes, plugged everything in, and fired up the gear, and you're greeted by a loud, annoying bzzzzzz! This won't do at all, so this week we'll take a look at how to minimize the risk of hum.
The prime cause of hum is the ground loop, caused when the sound system has two or more different ground points. This is easy to do if, for example, you plug your guitarist's amp into the onstage socket, and your mixer into the socket at the back of the house. These separate points will have different electrical potentials, causing
electrical current to flow. The result is easy to hear, but how do you fix the problem?
The best solution is to ensure that all AC power is supplied from one single circuit from the power mains. If that's not enough juice, at least make sure that all your circuits come from the same panel with the same ground.
The ground loop can also be broken by the use of a ground lift adapter, but it's not a very good idea, as this method is potentially fatal - breaking the ground means that the signal could potentially find its way to earth directly through YOU!
Poor or damaged cables can also be a source of problems as hum can be picked up from light fixtures, motors, and other common electrical sources. Avoid cheap molded-head connectors, and take time between gigs to check your cables for good solder joints, clean connectors, and undamaged shielding.
There is another cable-based source of hum induced from power cabling into signal cabling. Briefly, when the two types of cables are running parallel, the AC signal can be picked up by the signal cable, amplified, and broadcast for the world to hear! Keep your power and signal cables well separated, and if they must cross, always cross them at right angles to each other.
|
Amps & Speakers
By Dennis Kambury
When you're putting together a live sound reinforcement system, you may wonder - when confronted with the dizzying array of specs - just how large a power amp you need to drive your mains. If your speaker cab is rated at 200 watts, your initial assumption might be to match it with a 200-watt amp or less. After all, if you give your speaker too much juice, it'll blow, right? Not really!
While this will certainly work, to understand why more is better, we need to look at how power handling is defined. When you see a speaker that is rated at "200 watts average (program) power," that means it can handle a constant 200-watt signal without failing. A matching 200-watt amp will certainly do this, but the keyword here is "average." That means there will be peaks in the musical program that will be much higher than 200 watts! When these peaks happen, an underpowered amp will respond with distortion - and could damage or even destroy your speakers!
To get the most out of your speakers, both sonically and structurally, it's best to go with an amp rated two to four times the speaker's program rating. Run the amp in the middle of its range - you'll have great headroom, your ears will be treated to a better sound, and your speakers will still respect you in the morning!
|
|
|
|
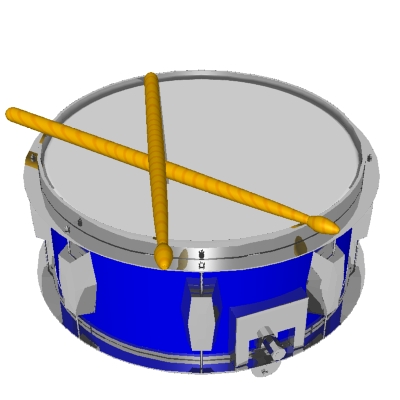
Drumset Assembly
Getting familiar with the kit
There are many different drum set combinations, the most common being the 5-piece kit. We will be assembling a kit consisting of these shell components:
1 - 16" x 22" Bass Drum
1 - 10" x 12" Ride Tom
1 - 11" x 13" Ride Tom
1 - 16" x 16" Floor Tom
1 - 5.5" x 14" Snare Drum
And these hardware components:
1 - Bass Drum Pedal
1 - Snare Drum Stand
1 - Hi-Hat Stand
2 - Tom Holders
3 - Floor Tom Legs
2 - Cymbal stands (one straight and one boom)
Let's Begin:
Start with the bass drum. Locate the bass drum hoops, which are the largest of the hoops, and are usually the same color as the drum kit. You will also need to find the hoop claws and the longest lugs in the bag of misc. hardware you will receive with the kit. You should have 16 of each (8 for each hoop). Set the bass drum so it is flat on the floor. A determination will need to be made as to which is the front head and which is the "batter side" head. With most drum kits you will have the manufacture's logo on one of the heads, which goes on the front of the drum. Determining the front of the bass drum is much easier. The side closest to the bass drum legs (or spurs) is the front.
Place one of the small washers on each of the long lugs and insert through the hole in the claw. They will only work one way, so try one before you put them all together. There are usually 8 lugs per side, so place the correct head on the drum, place the hoop on the head (it should fit on the outer rim of the head) and hang the claws on the hoop, threading them into the bridge lugs on the drum. Finger-tighten the head, turn the bass drum over and repeat. NOTE: often times a small pillow placed in the bass drum removes over-ring and adds punch.
Next the Toms. Locate the smallest of the toms and find the 2 heads and 2 chrome hoops that are the same size. There will also be 12 short lugs and 12 washers necessary for this drum kit. Place the head on the drum and the hoop on the head lining up the holes in the hoop with the bridge lugs on the drum. Place a washer on each lug and insert through the hole, and thread into the bridge lugs. Finger tighten only. Turn drum over and repeat. Note: Sometimes a top and bottom (batter head and bottom head) will be sent. The bottom head will always be thinner, usually transparent.
Using the same technique to do the other ride tom and floor tom, we should have all of the drums with heads. If the snare drum is not assembled, use the same technique for it as well.
Let's put it all together
Again let's start with the bass drum. Set the drum so that the 2 spurs are close to the ground, and the chrome mount located near the middle of the drum is pointing up. Set the legs so that they are holding the bass drum securely, and not able to rock sideways (as if rolling). Firmly tighten the spurs.
Find the 2 tom holders in the package of tubular hardware. Each of these should fit into one of the holes in the top of the bass drum. Insert them one at a time, and point them out, so you can slide the toms on without banging them into one another. As for the correct position, there is no right or wrong way to set them up. You will need to try different ways that work for you.
The Floor Tom is next. You will notice about 1/3 of the way up from the bottom that the floor tom has 3 chrome mounts. These are the leg mounts, and you will find 3 steel legs in the hardware box. They are approximately 18" - 24" in length and have an odd bend at one end, with a rubber foot. Insert these into the assemblies, and adjust to a comfortable height.
The snare drum stand is the stand with the shortest legs, and it will have a set of 3 "arms" which when folded down securely hold the snare drum. It will have a large adjustable nut under the basket, which you will use to tighten the 3 arms to hold the bottom of the snare. Another knob will adjust the height of the snare. Adjust it to a comfortable position. the 3rd adjustment is the angle adjustment. It adjusts the angle of the snare drum. Again, adjust it for comfort.
The bass drum pedal attaches directly to the bass drum hoop on the back side. Attach it and lock it down securely with the adjustment knob.
The hi-hat stand may be in 3 pieces.. a smaller solid shaft threaded at one end, a tubular piece with the cymbal cup and the tripod stand with the pedal. The smaller shaft threads into the nut on the stand assembly, then the tubular piece slides over the shaft, and into the stand assembly. A felt washer goes into the cymbal cup, and the cymbal clutch tightens with a wing nut to the shaft.
This leaves the 2 cymbal stands, which both use the same size tripod base. The straight stand will be in 2 or 3 telescopic sections, and the boom stand will have an addition piece with a hinge in the center. This allows you to place your cymbal closer to the drums.
Remember that the important thing to remember is to HAVE FUN! There is no right or wrong way to set your kit up. Try different things, and HAVE FUN!
|
Drumset Tuning
While there are many techniques to achieve different types of sound and tone, virtually all of the pro's agree that you must have even head tension to eliminate unwanted ring and overtones. In other words, the tension should be the same at each tuning lug. Sound easy? Well, due to modern manufacturing techniques and better heads, it is easier than it was a few years ago. However, it still requires some practice to develop your touch and ear.
Let us begin...
Kick Drum:
Putting a pillow into the bass drum is a way to help with the overtones and tuning of the drum. While its possible to achieve a good punch without it, most folks (at least other band members and recording engineers) prefer to have a solid "thud" sound with a slight over ring. Whether you choose to use a pillow or not, the tuning procedure is still the same.
Start by tightening the lugs until they are all finger tight. You will notice wrinkles in the head around the edges. Choose any tuning lug and tighten it 1/2 turn. Then, go directly across the head and do the same with that lug. Continue in this fashion around the drum until the wrinkles are gone and you hear a tone when you tap on the head. Once you begin fine-tuning, you will want to turn the lug no more than 1/4 turn. When tuned properly, you should hear the same pitch when you tap on the head in front of each lug. (Approximately 1" in from the rim.) Different shells sound different depending on how high or low they are tuned, so experiment with the tuning.
Snare Drum:
Because there are so many different types of materials used to construct snare drums, including wood, steel, copper and brass, the snare can be tuned to an amazing number of tones and textures. Again, experiment with different tunings to find the tone that works for you.
I prefer a very tight, fat snare sound. To achieve this I start with the bottom snare head. Using the same technique as the bass drum, make sure the tension is even as you go around the head. I like to have the bottom head as tight as possible, which gives the snare a tight snap when I hit it. Use your own judgment.
The top head I tend to keep quite a bit looser, in order to "fatten" the snare sound. If you still have too much over ring, a small piece of duct tape will help to alleviate this. Place it approximately 1" from the rim of the snare, directly across from you (this will keep you from hitting that spot with your sticks).
Toms:
Even tension on the top and bottom heads is critical for good tom tone. You may want to take each drum off the mount to tune the bottom head (using the same technique as above). Find a pitch that sounds good to your ear, and try to tune the drum to that pitch.
Again, there is no right or wrong tuning for your kit, as long as it sounds good to you. It will take a while to tune your kit, so don't get discouraged. The best advice I can give you is to use small increments when you begin to fine-tune the drums. 1/4 turns are usually more than enough.
One last tip. Placing the drum flat on a carpeted surface can also help when you are just learning to tune the drum. This dampens the other head, letting you hear just the head you are tuning.
|
|
|
|
The Lowdown on Effects
What are Phase Shifters & Flangers?
Phase shifters (or phasers) and flangers get their sound by creating one or more notches in the signal's frequency. The notches are created by filtering the signal, and mixing the filter output with the input signal. The filters can control the location, number of notches, and width of the notches.
Most phase shifters start with a simple filter, then add more filter stages to create more notches. A stereo phaser uses two filters with notches at different frequencies. You can also create more complex sounds by mixing the outputs of the two filters. This can give you virtually endless sonic possibilities. From subtle rotating-speaker effects, to swirling, edge-city sounds from classic 60's guitar solos, phasers can be a very useful addition to any player's arsenal.
Flangers produce the unmistakable jet-engine "whooshing" sound. Basically a type of phasing, a flanger creates a set of equally spaced notches in the audio spectrum. Phasing also uses notches, but multiple filters and user controls create random spacing.
What is a Delay?
Delay is one of the simplest effects out there and one of the most valuable. A little delay can bring life to dull mixes, widen your instrument's sound, and even allow you to solo over yourself. Delay is the also a cornerstone of other effects, such as reverb, chorus, and flanging.
Delay is created by taking an audio signal and playing it back after the delay time. The delay time can range from several milliseconds to several seconds. Most delays have a control that allows you to repeat the sound over and over, and it becomes quieter each time it plays back.
Long delay times can open up some cool possibilities. Once you get over a second, you can virtually loop on the fly. Just pay a riff, then play over that riff while its repeating. You can actually solo over yourself when you don't have a rhythm player.
A slapback delay has a very short delay time, usually between 30 and 100 milliseconds. Most folks consider a longer delay an echo.
Multi-tap delays allow you to create more complex patterns. Taking outputs from points within the delay line is called 'tapping'. The amount of delay between the various taps can be different. You can set the multi-tap delay to follow the rhythm of a song, or create amazing textures.
Ping-Pong delay bounces between the left and right channels of a stereo signal. It uses two distinct delay lines, each driven by an input. This produces two output signals, that create the classic 'bouncing' sound when panned hard left and right.
About Equalizers
Equalizers boost or cut specific frequencies in a signal. The most common equalizers are tone controls. They tailor your sound to suit your music. Bass and treble knobs control a lowpass shelving filter and a highpass shelving filter. Lowpass and highpass filters remove a portion of the sound spectrum. But shelving filters just pump up or reduce one portion while leaving the rest alone.There are also 'mid' controls found on 3-band equalizers. This 'mid' is sometimes called a peaking or bandpass filter.
Graphic equalizers provide more flexibility and control than tone controls, and they're easy to use. A graphic equalizer is a set of filters that allow you to control the amount of boost or cut in each frequency band. Controlled with sliders, the frequency response of the equalizer resembles the positions of the sliders, that's why it's called a 'graphic' equalizer.
A graphic equalizer uses a set of bandpass filters that are designed to completely isolate certain frequency bands. Each filter in the graphic equalizer has the same input. Their job is to only allow a small band of frequencies through.
Graphic EQ's are great for sound reinforcement and 'tuning' rooms. With a graphic equalizer that covers most of the audio spectrum, you can adjust your EQ so that you have a consistent sound at every venue.
For instruments, stomp-box equalizers are great for delivering a both a volume boost and changing tone for solo excursions.
Parametric equalizers give you the most flexibility, but are a bit more difficult to use. Unlike graphic EQ, that only lets you set the amount of boost and cut, parametric EQ allows you to also set the center frequency and the bandwidth. With practice, you can apply some boost to make a guitar cut through the mix, or to get a big, full sound.
Parametric EQs can eliminate feedback by using a lot of cut (also called a notch filter) positioned right at the frequency that is feeding back. You might be able to control the feedback with a graphic EQ, but if its bands are wide, you'll be cutting more of the sounds than you wanted. Parametric lets you fine-tune the cut, so you don't lose the good stuff.
Many amplifiers have 'presence' knob that boosts the mid to high frequencies. This control is supposed to make your instrument sound like it is actually in the room on recordings. It also helps an instrument slice through a muddy mix.
Expanders and Noise Gates
Expanders are dynamic processors that increases the dynamic range of a signal. They make loud sounds louder and soft sounds softer. They're like an amplifier with a variable gain control, and the gain is controlled by the level of the input signal. Expanders are used by musicians to produce more extremes in recordings that have a limited dynamic range. This gives the music more intense dynamics.
Noise gates are usually used to eliminate unwanted noise and hiss which would otherwise be heard when an instrument is not being played. The noise gate's threshold needs to be at the precise point so unwanted noise falls below it, and he instrument's complete notes can be heard.
Expanders and noise gates should be near the end of the effects chain, so noise created by other effects can be "gated" when you're not playing. I place my delay and reverb effects after the noise gate so their sounds trail off naturally.
|
Slide Guitar
What Are Some Tunings For Slide Guitar?
Some slide guitarists use the standard tuning - EADGBE. It provides a minor triad on strings 1,2, & 3, as well as a major triad on strings 2, 3, and 4. It's good for playing rock.
Most blues players use open tunings, such as open G: DGDGBD, and open D: DADF#AD. Both tunings can be raised up a step, to open A: EAEAC#E, and open E: EBEG#BE. Many of the great acoustic blues players used open tunings, such as Charley Patton, Robert Johnson, Son House, Blind Willie Johnson, and so many others, as well as electric slide masters from Elmore James to Bonnie Raitt.
For more modern styles, any tuning can be used, and there are many alternate tunings you can explore. Here are a couple of slide tunings used by experimental music guitarist Ted Killian: CGDGBD (Ted raises this a half-step on electric guitar), and C#GDGBbD. Explore, and enjoy.
What Can Be Done To Adapt An Electric Guitar For Playing Slide?
When you play with a slide, heavier gauge strings sound better and provide more resistance for a better feel. Gauges 11-54 or 12-54 are good. If you also want to bend strings some of the time, you can compromise by using strings one gauge higher than you usually play. If your guitar is manufactured to use light gauge strings, you may need to widen the nut slots enough to fit the heavier strings.
It helps to raise the action. Adjust the bridge saddles until the strings are high enough that they won't rub against the frets under pressure from the slide. On some electrics, the action is already as high as it will go, so check out the guitar first, to make sure it's appropriate for slide playing. Raising the strings also helps compensate for having a curved fretboard.
If the heavier gauge strings put too much tension on the neck, you may need to tighten the trussrod for more support. If you use lighter gauge strings and raise the action, you may need to loosen the trussrod to relieve the neck.
If the slide you use isn't curved, flattening the string radius slightly can compensate for a rounded fretboard.
After raising the action, lower the bridge pickup a little if the strings get too close to the pole pieces of the bridge pickup when you press down hard with the slide.
|
|
|
|
MORE STUFF FOR GUITAR PLAYERS
Q. "What are the tonal differences between the popular body woods Alder, Ash, Poplar, Basswood, Mahogany and Maple?"
A. (1.) Alder: full and rich, with fat low-end, nice cutting mids, and good overall warmth and sustain. Alder is generally considered to be one of the "traditional" body woods.
(2.) Ash: exhibits a "snappier" tone with a bright edge, but with a warm bass and long sustain. It is often considered the other "traditional" body wood.
(3.) Poplar: one of the softer hardwoods, nicely resonant with a meaty tone and pleasingly lightweight. Many guitar manufacturers are using this wood as a substitute for alder, as it is quite similar in tone.
(4.) Basswood: the principal wood used on most Japanese-made instruments. This is due both to its tonal response (once again, very similar to Alder), as well as the fact that Basswood is much more readily available to the manufacturers in Asia.
(5.) Mahogany: provides deep, warm mids, good sustain and nice "bite", and is famous for its heavy "crunch".
(6.) Maple: punchy and bright with a nice bite on the high end. Often used only as a laminated top instead of an entire body, as it tends to be a particularly heavy wood.
Q. "What does the term "neck radius" mean, relative to my guitar or bass?"
A. The measure of the curvature of the top of the fretboard from edge to edge is often referred to as the "neck radius". Actually, the correct terminology would be either fretboard or fingerboard radius and the neck shape and size would be called "neck profile". The fingerboard radius can be found by first drawing a circle with a corresponding radius, (the "radius" is the distance from the center of a circle to its outer edge), and then cutting out a portion of that circle corresponding to the width of the fretboard. For example, if you have a 7 1/4" radius fingerboard, you could tie a piece of string to a pencil, measure out a length of string to 7 1/4", and put a thumbtack on the other end of the string. Secure the tack, stretch the string, and draw a circle. By cutting out a piece of that circle the width of your fingerboard, you will have an example of an arc with the same curvature as that of your fingerboard radius.
Q. "What is a V, C or U shape neck?"
A. The letters V, C, and U are used today in an attempt to describe the shape and contour of the back of various guitar necks. Necks described by these letters will correspond (although not quite as exaggerated), to the visual appearance of these letters. The V shaped necks come in two different versions, a "soft" V and a "hard" V. The "soft" V shape is a bit rounded off, whereas the "hard" V is somewhat more pointed. There are a couple of other neck shape descriptions which do not have directly corresponding letters. These are the "oval" and the modern "flat oval". Many people, however, do use the letter "C" when referring generally to these "oval" shapes. The "U" shape is chunky and rounded, with high shoulders, as seen in the exaggerated letter U. There is no doubt that it is easier to understand the application of these terms to the necks when you put your hands on them and get the feel; however, the use of these letters is pretty accurate in describing the shapes of the backs of necks.
Q. "How often should I change my guitar or bass strings?"
A. There is no set rule for how often you should change your strings. If you're playing on strings which are worn, kinked, corroded, rusted or gunked up with sweat grease and grime, then it is definitely time to change them. If you find that you're having trouble keeping an older set of strings in tune, it's also a good idea to restring. Keep in mind that if you're constantly having tuning problems, especially with newer strings, the problem may actually be with your guitar (See below for common tuning problems and remedies). Really, the only other factors that'll determine how often you restring are how often you play and how much your fingers sweat while playing. If you play a number of times with the same set of strings and you find they're no longer giving you the tone, brightness and response that you desire, then it's time for a change. Some professional artists swear by having new strings put on for every new performance while others prefer the feeling and response of their strings once they have been "broken in". Once again, it is a preference and you should experiment until you determine what works best for you. Tip: wash your hands before playing.
Q. "Why are set-ups necessary and how often should I have one done on my guitar or bass?"
A. All electric guitars and basses which are made from wood are subject to changes in temperature and humidity. Guitars are machines which have moving parts, and like any other machine, they require periodic maintenance and adjustment in order to ensure a maximum level of performance and playability. It is very important to familiarize yourself with the different points of adjustment on your guitar or bass i.e. truss-rod, tilt-adjust, saddle and bridge height, and intonation, as these features are there for a very important reason. The woods of your guitar absorb the moisture (humidity) in the air, and expand and contract with changes in both temperature and humidity. This phenomenon may be illustrated easily with the following example: Suppose your guitar is already in tune, and you subsequently transport it during the heat of summer, to an air-conditioned venue. When you take it out of the case and let it cool to room temperature, the pitch of the guitar will dramatically drop as the wood cools and shrinks, causing the tension on the guitar to decrease. While this dramatic example may not require immediate adjustment compensation, it is often necessary to make seasonal adjustments in the action of your instrument to compensate for these changes. It is also important to note that changing string gauges or materials will also affect the amount of tension on the neck and will usually require a neck adjustment to compensate for this change in tension. It is also not uncommon to experience a "settling in " period with a new instrument, where periodic adjustments in the action must be made until the wood stops moving, (bear in mind that seasonal adjustments may still be necessary). If you do not feel comfortable making adjustments in the action of your guitar, we would recommend that you have a qualified technician check out your instrument for the proper setup adjustments approximately every 6 months. This would also be a great time for your tech to keep an eye on things such as fret wear, intonation, etc.
Q. "How do I intonate my guitar or bass?"
A. To maximize the performance of your guitar you must be sure to always keep your guitar properly intonated so that the instrument will be in relative tune to itself. Always check and adjust the intonation as needed after every change of strings. When we intonate a guitar we shorten or lengthen the active vibrating length of a string so that it will be in tune with itself, given the scale length of the instrument, as well as differences in string gauges and micro-variations from string to string which occur in the manufacturing process. To set the intonation for your guitar you will need either a digital or strobe tuner, either a small Phillips or standard screwdriver (depending on the type of saddle length adjustment screws on your bridge). We recommend Floyd Rose tremolo's be adjusted by a professional. It is also important to install new strings just prior to adjusting the intonation. The procedure for setting your intonation is as follows:
1. Plug into your tuner and with the volume full up on the guitar, strike the harmonic at the 12th fret and tune the string to the appropriate pitch.
2. Lightly press the string to the 12th fret and recheck the pitch at the tuner.
3. If the pitch of the harmonic and the pitch of the stopped string at the 12th fret agree, then your string is properly intonated and no adjustment will be necessary. If the pitches disagree you'll need to make an adjustment.
4. If the stopped or fretted note is sharper (higher) in pitch relative to the harmonic, you will need to lengthen the active vibrating length of the string until the pitches agree. To do this, you must turn the saddle length adjustment screw, (located at the rear of the bridge-plate) clockwise, and move the saddle back, until the harmonic note and the stopped note are registering as the same pitch. Make sure you stop and retune the string often at the harmonic, as the movement of the saddle will have an effect on the pitch of the string during this process.
5. If the stopped or fretted note is flatter (lower) in pitch relative to the harmonic, you will need to shorten the active vibrating length of the string until the pitches agree. To do this, you must turn the saddle length adjustment screw, located at the rear of the bridge-plate, counter-clockwise and move the saddle forward until the harmonic note and the stopped note are registering as the same pitch. You may need to press the saddle forward if downward pressure from the strings does not allow the saddle to freely move.
6. When this procedure is complete, simply retune your guitar and you're ready to play.
Always make sure that you use proper left hand fretting technique as too much downward pressure as well as a claw type grip will pull your notes out of pitch and your guitar will sound out of tune to itself even if properly intonated.
Q. "What precautions should I take when traveling on an airplane with my guitar?"
A. First, you'll need to determine if the airline will allow you to carry the guitar on board with you for storing in the overhead compartment, or if you must check it for transport in the cargo hold of the plane. In both instances, you will want to make sure the guitar is packed with sufficient padding to prevent any movement and potential damage within the case. If you are carrying your guitar on board, a gig bag will certainly do the job, as long as you ensure that other harder and heavier luggage does not get either placed on top of or shoved into your guitar. If you must check your guitar, make sure it is in a hard protective case and has extra padding inside to prevent movement within the case. It is highly recommended, (as some baggage handlers may not treat your property with the same amount of care you do), that when transporting your guitar in the hold of any air transport, that you do so in an ATA approved, locking flight case. De-tuning or loosening the strings on most electric guitars and basses is not necessary; however, for acoustic guitars, set neck or hollow body guitars, it is recommended that you de-tune 1/2 to 1 whole step. Just to be safe, it is always a good idea to insure your instrument against loss or damage.
Q: What is "stand damage"?
A: Stand damage occurs when the chemicals in the rubber used on guitar stands react with the nitro-cellulose lacquer used to finish some instruments. It can range from a slight discoloration to the finish to actually "eating away" the lacquer topcoat. Unfortunately, this situation is not covered under your warranty. The safest way to prevent this from happening is to cover the rubber parts of your stand with a soft cotton cloth (use guitar polishing cloths). Guitar stands should only be used to 'temporarily' store your instrument, such as on a gig. The safest place to store your instrument is in its case.
Q: What can I do to prevent tarnish on the hardware?
A: Tarnish on hardware occurs due to a reaction between the plating and moisture, either in the air or from perspiration. Keep in mind that all hardware will tarnish eventually- it is not a sign that your hardware is "cheap." In some areas there is low moisture content in the air so the tarnishing process will be slower, but it will eventually happen. You can slow down the tarnishing process by wiping down the instrument every time you play it! This one step will add life to the hardware and slow down the tarnishing process. Also, make sure you store the instrument in its case to prevent it from exposure to high moisture content level in the air. In areas of high humidity add a silicon bag in your case or gig bag.
Q. What is the best way to clean my Acoustic ? Is it necessary to condition the fingerboard?
A: We recommend that you clean your guitar or bass after each use, taking care to wipe down the entire instrument, including the strings and hardware, with a clean, soft cloth. Periodic cleaning with a good quality pump cleaner/polish is advised when it is necessary to remove fingerprints or body oils. To do this, spray the polish onto a soft cloth and wipe the body and neck, taking care to avoid the strings and hardware. Frequent conditioning of Rosewood and Ebony fingerboards will help prevent the possible cracking of the fingerboard which may occur in dry climates if the fretboard is allowed to over-dry. We would suggest that you use either raw linseed oil, lemon oil, or another commercially available fingerboard conditioner and that you follow the directions provided by the manufacturer of these products. Note: take care to remove the strings before conditioning your fingerboard and dry any excess oils from the fretboard before replacing the strings. Be careful to avoid any contact with your guitar's finish, electronics, and hardware when using these conditioning materials. For regular string care and maintenance, certain products are safe and effective for removing excess oil and dirt from your strings and in turn, prolonging string life.
Q. " How do I care for my nitro-cellulose lacquer finish?"
Some instruments are finished using layered coats of nitro-cellulose lacquer. Although this material is very beneficial to the overall appearance and tone of the instrument, there are some specific guidelines for its care and maintenance. Exposure to certain synthetic materials, leather straps, and cushions such as those found on some instrument stands could adversely affect the finish. To ensure your finish maintains its beauty, please follow these steps:
- Never cover or wipe your instrument with synthetic materials.
- Always remove the strap from the instrument when not in use.
- Cover or replace guitar stand cushions with cotton cloth.
Perspiration can also damage the guitar finish as well as the hardware finish. Always clean your instrument and hardware with a soft, non-synthetic cloth before storing it. To prolong the beauty and durability of the finishes we recommend polishing it with a Hi-Gloss Polish. A rapid change in temperature or humidity can result in small cracks in the finish known as "finish checking". In most cases it happens when a chilled instrument is exposed to warm air. It occurs most frequently in the winter when a guitar case is opened in a warm room or studio after being outside. This is a result of the wood expanding faster than the lacquer. While this condition does not affect the tone it certainly does affect the appearance. To eliminate the possibility of this happening to your instrument we recommend you warm it slowly by opening the case slowly and fanning it to induce warm air to circulate over the top. If a bright bluish fog appears on the top, close the case immediately and let it warm up for a few minutes. Then lift the instrument a little bit from the case and allow the rest of it to warm to room temperature.
Q) I have a 12-String. Do I need to "tune-down" my guitar to prevent the possibility of either the bridge lifting or damage to the top of the guitar?
A: It is just fine for you to tune your 12-String to standard concert pitch when using light or extra light strings. We do recommend, however, that if you use heavier strings, that you do not tune them to concert pitch. Medium or heavy gauge strings, when tuned to concert pitch, create a tremendous amount of tension on the instrument, and may eventually cause damage to the top of the guitar if used for long periods of time. If you feel your technique and playing style dictate that you must use heavier gauged strings, we would indeed suggest that you tune your guitar down either ½ or one whole step to E flat or D, and capo the guitar at the 1st fret. Many 12-string players prefer to de-tune and use a capo regardless of the string gauge used, as they find that the reduced string tension enhances the playability of their guitars.
Q) What precautions should I take when storing or traveling with my guitar?
1. Exposure to extreme temperatures or sudden changes in temperature and/or humidity, may cause cracks or "checking", to occur in your guitar's finish. These same conditions may also cause cracks to occur in the wood itself. To ensure the integrity of your guitar's woods during its lifetime, it is critical to maintain the instrument within an acceptable temperature and humidity range. Ideally the temperature should be maintained as closely as possible to 70 F and the humidity should be maintained between 40% and 50%. To ensure an appropriate level of humidity in your instrument's woods, it may be necessary to use a commercially available humidifier. These humidifiers incorporate a system which allows you to monitor the humidity level in your instrument and make adjustments as needed.
2. When traveling long distances with your instrument or when storing it for extended periods of time, you'll want to lower the pitch of the strings approximately 1 to 1½ step to reduce the amount of tension on the neck. When transporting the guitar in either summer or winter from say,… your home, to your car, to a third location, you need to be aware that temperatures can vary dramatically from location to location. ALWAYS allow time for the instrument to sit and acclimatize to room temperature inside the case before opening the case and removing the instrument. As guitars are made from organic components and use different types of woods in one instrument, these woods and materials expand and contract at different rates with changes in temperature and humidity Opening an instrument case prematurely for example: after bringing it in from a cold car to a heated venue or from a hot car to an air-conditioned room is the most common cause of both finish and wood cracks in acoustic guitars.
Q. How do I travel with my acoustic guitar?
A. Most guitar owners will be adamant about keeping their guitar on the back seat of their car versus the trunk, imagining the worst case scenario of being rear ended on the highway. There are even better reasons. The temperature in the trunk is more extreme, and extreme climatic changes can cause wood cracks and lacquer checks. The car interior is always more comfortable. Hence, your first basic rule of thumb is to keep your instrument where you yourself are comfortable. I'm sure you wouldn't choose the trunk of a black car in July, or the trunk of a white care in sub-zero weather for that matter! Once you arrive, allow the guitar to acclimate. That is, let it sit in the closed case in your new environment for ten to fifteen minutes before playing. For those of you who travel on planes with your Martin, try with sincere and charismatic style to avoid checking your guitar as luggage. Most p |
|
|